News
How to use a multimeter?
Using a multimeter requires understanding its basic functions and safety precautions. Multimeters can measure voltage, current, resistance, and sometimes other parameters like capacitance, frequency, or temperature. Below is a step-by-step guide:
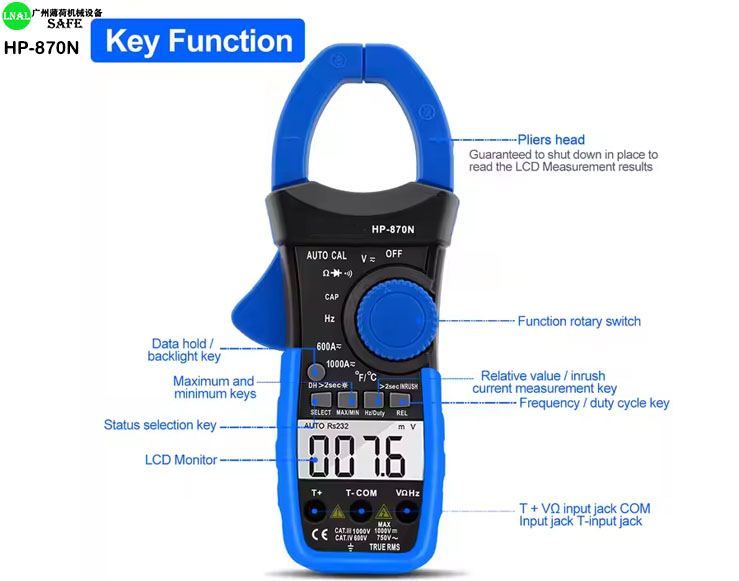
1. Understand the Multimeter’s Parts
Display: Shows the measurement reading.
Dial/Selector Knob: Choose the type of measurement (voltage, current, resistance, etc.).
Ports: Where test leads are plugged in:
COM: Common ground (black lead).
VΩmA: For voltage, resistance, or small current.
10A/20A: For measuring high current (if applicable).
Test Leads: Probes (black and red wires) used to make contact with the circuit.
2. Safety Precautions
Ensure the multimeter is set to the correct mode before connecting it to a circuit.
Never measure voltage in the current mode to avoid damaging the device.
Avoid touching exposed wires or conductive parts.
Always start at the highest range setting if you're unsure of the voltage/current level.
3. Setting Up
Insert the Test Leads:
Plug the black lead into the COM port.
Plug the red lead into the appropriate port based on the type of measurement.
Turn On the Multimeter:
Rotate the selector knob to the desired function (e.g., voltage, resistance).
4. Measuring Voltage
AC Voltage (V~): For household circuits or appliances.
DC Voltage (V- or V⎓): For batteries or electronics.
Steps:
Set the dial to the appropriate voltage range (AC or DC).
Touch the black probe to the ground or negative terminal and the red probe to the positive terminal.
Read the voltage on the display.
5. Measuring Current
Low Current (mA): Use the VΩmA port.
High Current (A): Use the 10A/20A port.
Steps:
Set the dial to the current (A) mode.
Break the circuit where the current flows and connect the multimeter in series.
Place the black probe on the side closer to the power source.
Place the red probe on the side going to the load.
Read the current on the display.
6. Measuring Resistance
Steps:
Set the dial to the resistance mode (Ω).
Ensure the circuit is powered off to avoid damage.
Place the probes across the component you want to measure.
Read the resistance on the display.
7. Continuity Test
Purpose: Checks if a circuit is complete.
Steps:
Set the dial to the continuity mode (⎓ or a sound wave symbol).
Touch the probes across the circuit/component.
If the circuit is complete, the multimeter beeps.
8. Additional Features
Capacitance: Set the dial to capacitance (F) mode, discharge the capacitor, and measure using the probes.
Frequency: Set to Hz mode, and measure as required.
Temperature: Attach a temperature probe (if supported).
9. Turning Off
Turn the dial to the OFF position when finished.
Disconnect the test leads.
Tips for Beginners
Always start with the highest range setting.
Double-check the mode and probe connections before measuring.
Use a non-contact voltage tester for initial checks if you're unsure about live circuits.
With these steps, you can safely and effectively use a multimeter for various electrical measurements.
RELATED NEWS
- UV IR Flame Detector with CE SIL 3C Certificates 2025-03-05
- National Standard Detection Methods for Hydrogen Sulfide (H₂S) gas leak detecto 2025-03-02
- National Standard Detection Methods for Hydrogen Sulfide (H2S) gas detector 2025-03-02
- National standard test method for hydrogen sulfide, gas leak detector 2025-03-02
- How to choose ultrasonic water flow meter? 2025-02-21
CATEGORIES
LATEST NEWS
CONTACT US
Contact:Ella Huang
Phone:+8613437856962
Tel:+8613437856962
Email:sales@lnalsafe.com
Add:Panyu District, Guangzhou City, Guangdong Province


 Ella Huang
 Ella Huang